TRUE-HTS1
TrueGel3D® HTS Hydrogel Plate
Synonym(e):
TrueGel3D® HTS Hydrogel Plate
Anmeldenzur Ansicht organisationsspezifischer und vertraglich vereinbarter Preise
Alle Fotos(1)
About This Item
UNSPSC-Code:
12352207
NACRES:
NA.71
Empfohlene Produkte
Verpackung
pkg of 1 plates
Qualitätsniveau
Hersteller/Markenname
Sigma-Aldrich
Wachstumsmodus
N/A
Methode(n)
cell culture | mammalian: suitable
Versandbedingung
ambient
Lagertemp.
15-25°C
Allgemeine Beschreibung
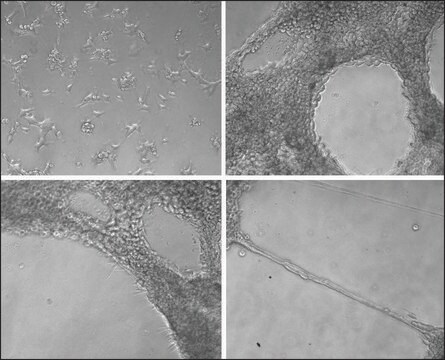
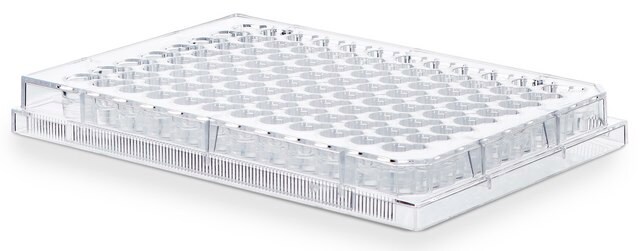
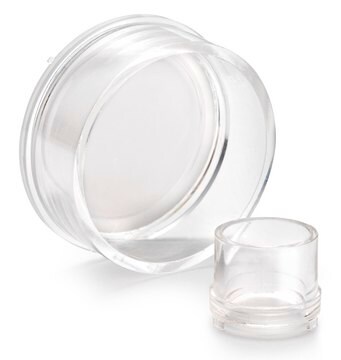
The TrueGel3D® HTS Hydrogel Plate is a ready-to-use solution to easily establish 3D cell cultures using fully synthetic hydrogels in a simple and automation-compatible manner. The 96-well polystyrene glass bottom plates contain precasted synthetic functionalized PEG based hydrogels. These innovative hydrogels contain gradually increasing crosslinking densities throughout the well. Users can proceed directly with seeding cells without any hydrogel preparation or encapsulation steps. After cell seeding, cells will gradually infiltrate the hydrogel and establish a 3D cell culture environment within days. Furthermore, this newly engineered hydrogel surface gives the user the possibility to sequentially establish co-culture systems seeding different cell populations at different time-points in the same hydrogel.
References
Benjamin R Simona. Soft Hydrogels Featuring In-Depth Surface Density Gradients for the Simple Establishment of 3D Tissue Models for Screening Applications. SLAS Discov. 2017 Jun;22(5):635-644.
References
Benjamin R Simona. Soft Hydrogels Featuring In-Depth Surface Density Gradients for the Simple Establishment of 3D Tissue Models for Screening Applications. SLAS Discov. 2017 Jun;22(5):635-644.
Anwendung
Plate Cleanliness: Particle count/well by microscope inspection <10.
Hydrogel Transparency: Pass
Hydrogel Thickness: Pass
Microbiological Analysis: Negative for Microorganisms according to ISO 11737-1.
Hydrogel Transparency: Pass
Hydrogel Thickness: Pass
Microbiological Analysis: Negative for Microorganisms according to ISO 11737-1.
Protocols
General Protocol for Cell Seeding and Culture Maintenance Note: Before starting please verify the good status of the plate. The polyethylene (PE) pouch must be intact with no visible liquid inside. The plate must be intact inside the pouch. Open the PE pouch with scissors or a scalpel under the sterile laminar flow bench. Once removed from the pouch, the plate is still sealed on its top-side with a polypropylene (PP) adhesive foil which is keeping the content inside each of the 96 wells. From the glass bottom side, verify that the glass cover is intact and that the gels look transparent, like if the wells were filled with water.
1. Warm assay plate. Make sure the plate was at room temperature for at least 30 minutes prior use.
2. Prepare the cells and media to be used.
3. Remove the sealing adhesive foil. Carefully peel off the sealing tape from the assay plate. We suggest to firmly hold the plate with the left hand on the table and peel off the sealing foil with the right hand starting from the top-right angle of the plate and slowly moving to the bottom-left angle of the plate. A liquid meniscus may form on top of the wells due to the negative pressure applied by removing the foil, but this meniscus pops and disappears within seconds.
4. Aspirate the storage buffer. Insert the pipet tip in the well and descend along the side wall. Place the pipet tip on the plastic ring inside the well and carefully aspirate the storage saline buffer. It is normal to perceive a small suction resistance. Slightly lift the pipette tip and the liquid will be aspirated. Note: Do not touch or aspirate right over the gel because of the risk of damaging it. It is possible to use multichannel pipets or pumps (low suction pressure) to accelerate the process. It is acceptable If some storage buffer remains on the well because it is a Tris buffer which won′t negatively affect you culture development. Minimize time between step 4. and 5. to reduce the risk of drying the gel.
5. Add cells and medium. Add the cell suspension with a maximum volume of 200 μL in each of the wells. Transfer the plate to the incubator. Keep cells in culture and change culture medium every 2nd day applying similar pipetting techniques as in step 4 and 5 to establish a 3D cell culture environment. Note: Residual trace activity of trypsin can result in digestion of the hydrogel. Especially when using serum free media, after detaching the cells, make sure to inhibit trypsin using a trypsin inhibitors or inactivating solutions (i.e. soybean). Optimal cell seeding density depends on culture types and readouts. To better control the concentration of your medium components, it is possible to soak and rinse the hydrogel with the culture medium before the addition of the cells.
6. Sequential seeding of cells (optional).At a desired time point, remove medium and add a second cell population in co-culture medium (maximum volume of 200 μL per well). Keep in culture until assay end. Change medium every other day.
Leistungsmerkmale und Vorteile
3D Cell Culture
Lagerung und Haltbarkeit
Store all components of the TrueGel3D® HTS Hydrogel Plate at room temperature (do not freeze) away from direct sources of light and heat. Do not store upside down.
Rechtliche Hinweise
TRUEGEL3D is a registered trademark of Merck KGaA, Darmstadt, Germany
Haftungsausschluss
Unless otherwise stated in our catalog or other company documentation accompanying the product(s), our products are intended for research use only and are not to be used for any other purpose, which includes but is not limited to, unauthorized commercial uses, in vitro diagnostic uses, ex vivo or in vivo therapeutic uses or any type of consumption or application to humans or animals.
Lagerklassenschlüssel
11 - Combustible Solids
WGK
WGK 1
Flammpunkt (°F)
Not applicable
Flammpunkt (°C)
Not applicable
Analysenzertifikate (COA)
Suchen Sie nach Analysenzertifikate (COA), indem Sie die Lot-/Chargennummer des Produkts eingeben. Lot- und Chargennummern sind auf dem Produktetikett hinter den Wörtern ‘Lot’ oder ‘Batch’ (Lot oder Charge) zu finden.
Besitzen Sie dieses Produkt bereits?
In der Dokumentenbibliothek finden Sie die Dokumentation zu den Produkten, die Sie kürzlich erworben haben.
Unser Team von Wissenschaftlern verfügt über Erfahrung in allen Forschungsbereichen einschließlich Life Science, Materialwissenschaften, chemischer Synthese, Chromatographie, Analytik und vielen mehr..
Setzen Sie sich mit dem technischen Dienst in Verbindung.


